 John M. Wargo
Sizing Windows in Windows

Posted: December 17, 2010 | | Categories: Microsoft Windows
In all of the different things I do, I often spend a lot of time writing about computer-related topics. With my book, magazine articles, conference presentations and in my regular day to day job activities, I find myself needing screen shots of Windows computer screens. While it's really easy to grab screen shots in Widows (I'm a huge fan of Snagit From TechSmith Corporation) it's not always easy to set the size of the window you're taking a snapshot of. When working with a full screen window, it's not that big of a deal, but I've got a huge monitor (at least it was huge 5 years ago when I bought it) so full size screen shots won't fit in most mediums I publish in.
A long time ago I went looking for a utility I could use to set the size of windows in Windows in order to be able to take screen shots at a more medium friendly size. I came across a free utility called Sizer from Brian Apps that does the job for me (almost - I'll explain later).
When you install Sizer, it installs an application that, when launched, places an icon in the Windows system tray (shown in Figure 1 with an orange box around it) and also enables a context menu that you (shown in Figure 3) can use to resize any window.

Figure 1 – Sizer System Tray Icon
Configuring the Program
Before you can use the program, you need to configure the different window sizes you want to be available in the program. If you right-click the Sizer system tray icon and select 'Configure Sizer…' from the menu that appears, you will be presented with a screen similar to the one shown in Figure 2.
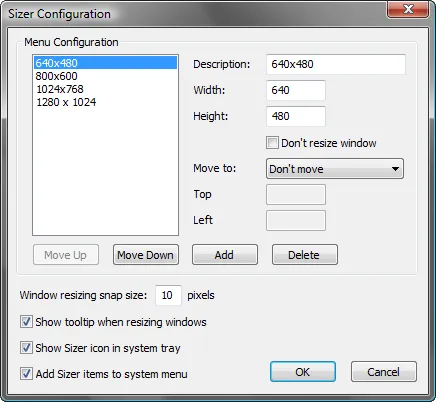
Figure 2 – Sizer Configuration Dialog
From this dialog, you configure the different window sizes you wish to be able to use when resizing windows. You can set specific window dimensions or use the program to set a specific window position. When you have the settings configured the way you want them, click the OK button and you're ready to go.
Using the Program
To resize the window, right click on the window's title bar and you will be presented with a menu similar to the one shown in Figure 3. At this point, you can select one of the pre-configured window sizes and Sizer will resize the window to the selected dimensions, keeping the window's upper left corner in the current position (unless you selected an option that also moves the window).
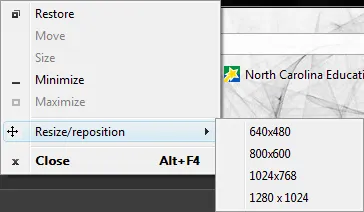
Figure 3
The program works pretty well and I've used it for many, many years now. It's proven to be very useful and well worth the cost (it's free!) What bothers me though is that some windows won't display the context menu. The Windows Explorer application in Vista 64 won't display the context menu when you right-click on the title bar. It's not really a problem though since I can still select the window and resize it by right-clicking on the system tray icon then picking a window dimension from the pre-configured list.
If you're looking for a way to resize windows quickly and easily – give this free utility a try.
Next Post: Perfecto Mobile
Previous Post: It's the BlackBerry Browser's Fault
If this content helps you in some way, please consider buying me a coffee.