 John M. Wargo
Using the DFRobot I2C 16x2 LCD display

Posted: Saturday, April 13, 2024 at 10:22 AM | Categories: Internet of Things (IoT)
I'm a fan of many products from DFRobot and they occasionally gift me with newer products to use and write about here. I'm working on something now that leverages their Gravity: Lightning Distance Sensor and I wanted to use a display to show lightning distance. For this I'm using the I2C 16x2(1602) LCD Display Module for Arduino and as I started to build the project, I wanted to test the LED display separately to learn how to write to it. I ran into some problems with the DFRobot Wiki and drivers for the board, so I decided to write this post to help others get through the same issues.
Connections
Starting at the I2C_TWI_LCD1602_Module__Gadgeteer_Compatible___SKU__DFR0063_-DFRobot I immediately noticed a problem. It may be fixed by the time you read this, but the connection diagram on the page is for a completely different product (I can't even tell what it is - something to do with a robot).
So, to understand the connections, I looked to the back of the display and found the I2C connections properly labeled on the board.
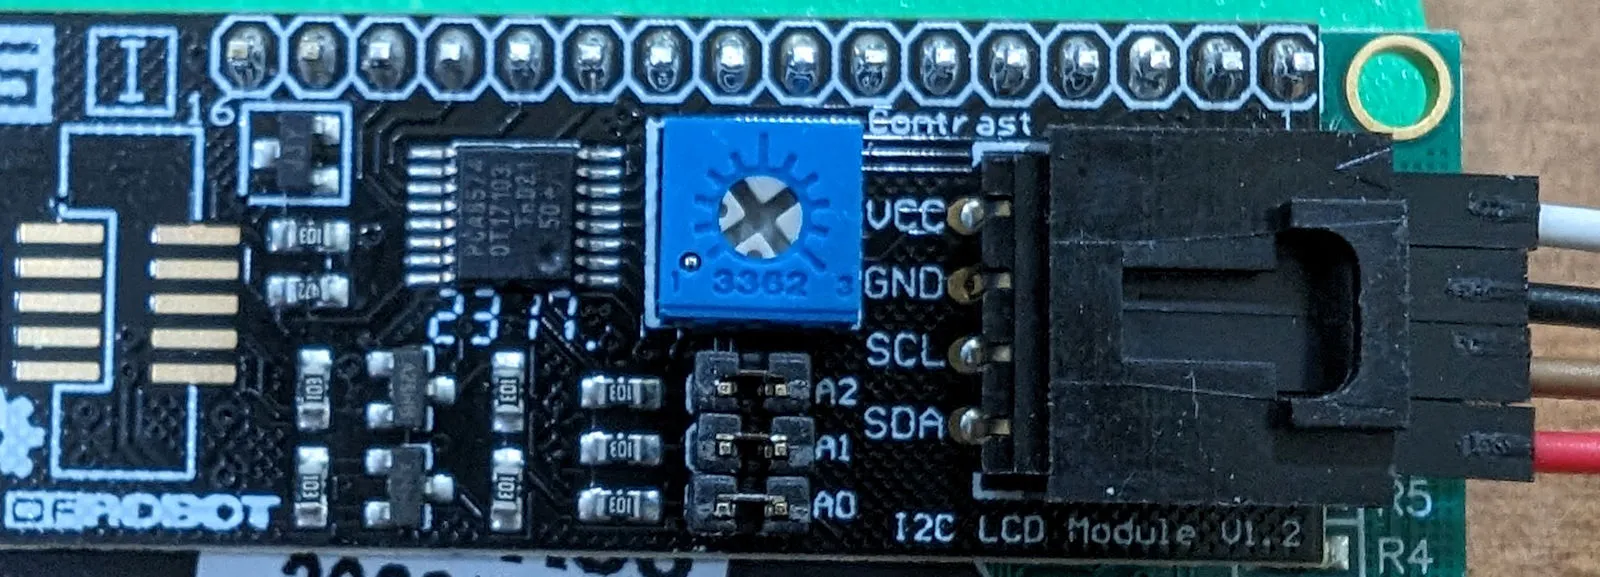
Top to bottom, the connections are:
- VCC
- GND
- SCL
- SDA
Connect those pins to the corresponding pins on an Arduino device and you're all set.
Library Installation
In other wiki tutorials, DFRobot links to the library source with instructions for how to install the required library (or libraries) in the Arduino IDE. I looked for those instructions and didn't find them and almost missed the link labeled Sample Code and Library just inside the Sample Code section of the Wiki.
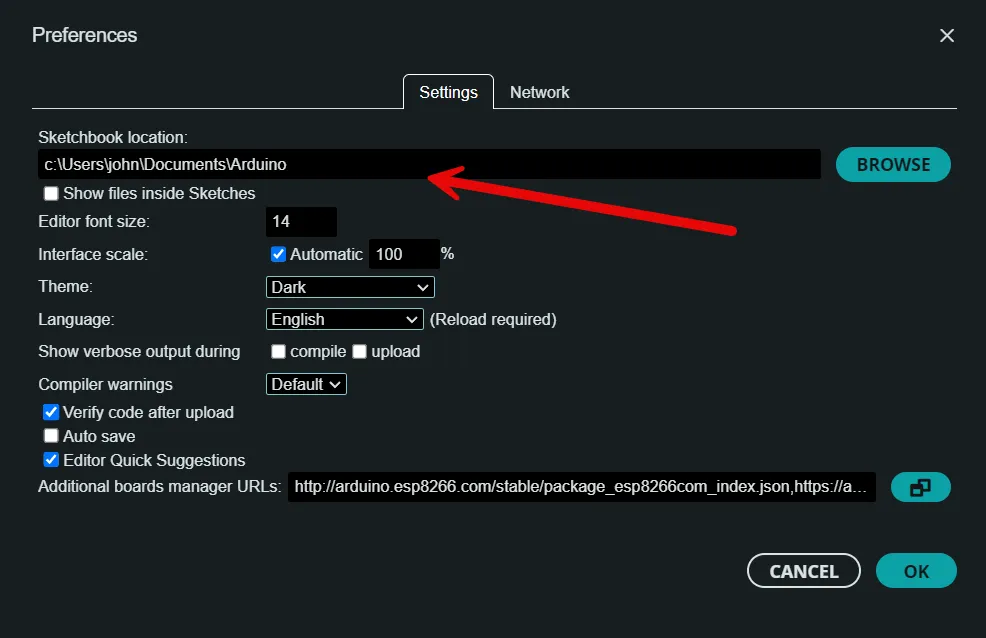
Download that file and unzip it into your Arduino libraries folder on your system. To locate your system's Arduino Libraries, open the Arduino IDE, then open the File menu and select Preferences. The Sketchbook location field contains the location of the system's Arduino folder, the libraries folder should be right underneath that folder (Arduino/libraries).
Alternate Library Installation
If, for whatever reason, you don't want to install the LCD display library in the Arduino IDE, you can also install the files directly in your project folder as shown below:
D:\dev\hardware\DFRobot\led-display-test>ls -l
total 16
-rw-r--r-- 1 john 197609 8848 Apr 13 10:46 LiquidCrystal_I2C.cpp
-rw-r--r-- 1 john 197609 3456 Apr 13 10:46 LiquidCrystal_I2C.h
-rw-r--r-- 1 john 197609 1095 Sep 12  2009 keywords.txt
-rw-r--r-- 1 john 197609  380 Apr 13 10:46 led-display-test.ino
To do this, I extracted the files in the download and copied the contents of the LiquidCrystal_I2C folder (skipping the examples folder) into my project folder. With that in place you have to make one change to the sample sketches. Change the line that loads the library in the sketch from:
#include <LiquidCrystal_I2C.h>to:
#include "LiquidCrystal_I2C.h"This tells the IDE to load the library locally instead of pulling it from the libraries folder.
Here's the complete modified sample code, so you can copy it into your local IDE if you want:
//DFRobot.com
//Compatible with the Arduino IDE 1.0
//Library version:1.1
#include <Wire.h>
#include "LiquidCrystal_I2C.h"
LiquidCrystal_I2C lcd(0x20,16,2);  // set the LCD address to 0x20 for a 16 chars and 2 line display

void setup()
{
  lcd.init();                      // initialize the lcd

  // Print a message to the LCD.
  lcd.backlight();
  lcd.print("Hello, world!");
}

void loop()
{
}
Running the Code
With the library extracted to the correct location and everything wired up as described above, the sample code I found (both sketches) worked perfectly on my system.
Next Post: Postal Scam Urtye dot com
Previous Post: Amazon Digital Music Hell
If this content helps you in some way, please consider buying me a coffee.
Header image: Photo by Robin Glauser on Unsplash.