 John M. Wargo
Controlling the Vosentech MicroFogger From An Arduino

Posted: October 28, 2023 | | Categories: Internet of Things (IoT), Arduino
Links On This Page
Note: This post is just a starting point, I published a better version of this post's code in A Better Arduino MicroFogger Controller and an even better (more better) version in A Better Arduino MicroFogger Controller Redux.
For this year's Halloween project, I needed a battery powered smoke machine. I purchased a couple of different devices to try them out, and finally settled on the Vosentech MicroFogger 5 Pro.
One of the reasons I selected the MicroFogger device is because they offer an add-on board that allows you to control the smoke machine from an Arduino (or similar) device: MicroFogger control cable and breakout board. With this board, you can charge the MicroFogger battery and control smoke generation at the same time.
In this post, I'll show you how to control the MicroFogger from an Arduino sketch and randomly generate smoke; here's a video demonstrating the end result:
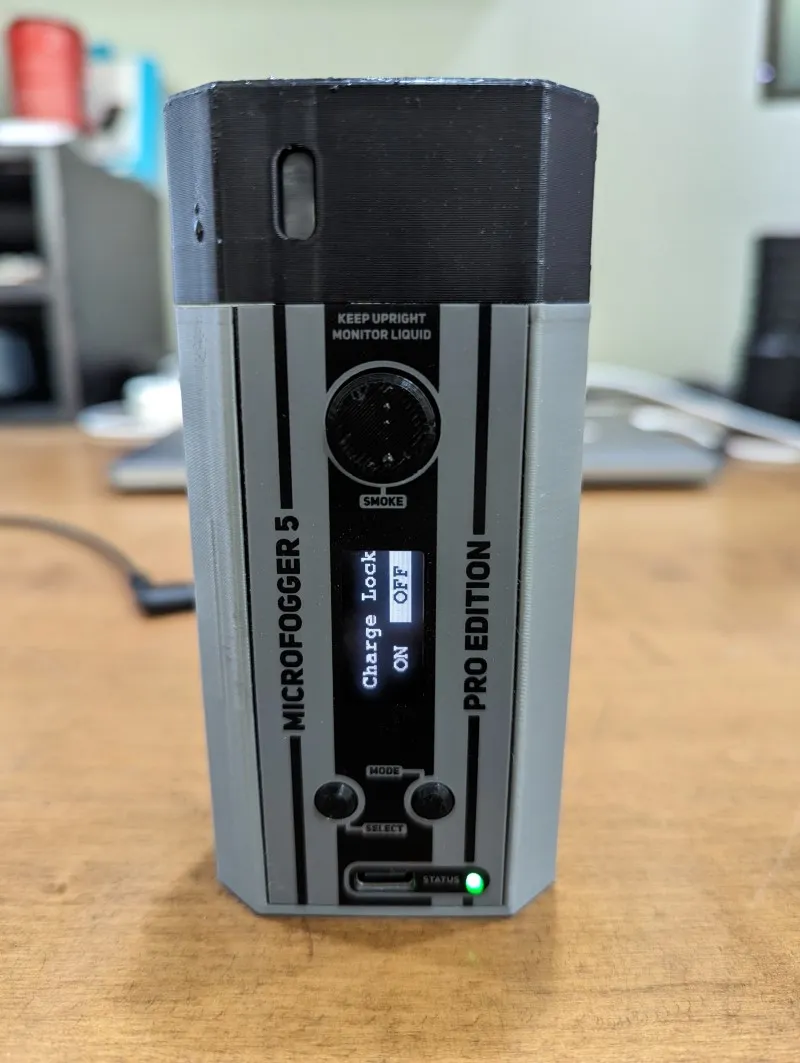
To use the controller board to control the MicroFogger from an Arduino sketch, you'll have to change two settings on the device. Follow the instructions in the user guide to navigate to the Advanced settings section. There, you'll first need to disable Charge Lock (set it to OFF) so you can charge the device from the connected Arduino while using it.
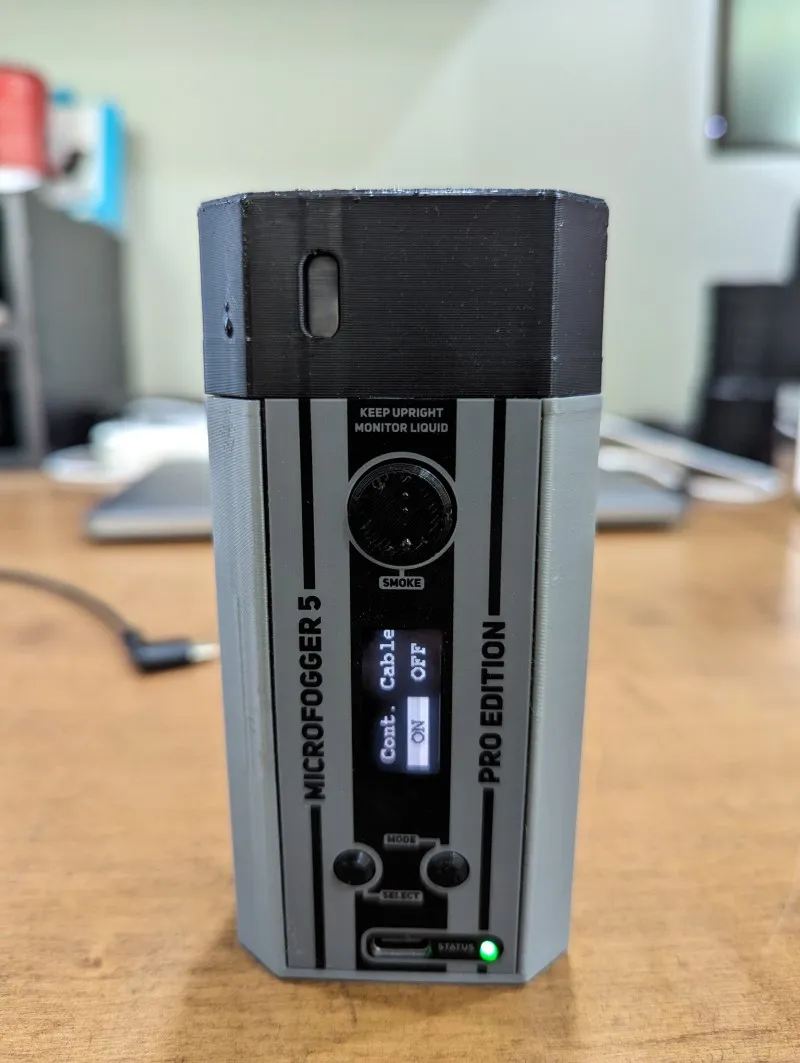
Next, enable the control cable (set it to ON) as shown in the following figure.
With the correct settings in place, connect the Arduino-compatible device to the controller card as shown in the following figure. For this, I connected the 3V, Ground, and the A0 connections on the controller card, in this case an Adafruit Feather, to the MicroFogger. Plug the controller cable into the controller card and MicroFogger and you're all set.

To control smoke generation, all you have to do is set the Arduino output pin (A0 in this example) to HIGH and as long as it's HIGH, the MicroFogger will generate smoke. Turn the output pin off (LOW) to stop smoke generation.
In the sketch below, I defined three defines at the beginning of the sketch. These are essentially compiler directives that instruct the compiler to replace the variable name with the value everywhere in the sketch. It allows you to change the pin connected to the MicroFogger in a single place rather than multiple places throughout the code. The MIN_SMOKE_TIME and MAX_SMOKE_TIME defines specify the minimum and maximum number of milliseconds used to randomly generate smoke and wait before generating again.
#define SMOKE_PIN A0
#define MIN_SMOKE_TIME 1000
#define MAX_SMOKE_TIME 5000
The setup function configures the Pin connected to the MicroFogger control board for OUTPUT meaning the sketch can set the output of the pin to HIGH or LOW turning the MicroFogger on and off. It also configures the onboard LED on the Feather device. The sketch uses this to turn the LED on at the same time as it turns on the MicroFogger; this helps you troubleshoot the sketch if it doesn't seem to be working correctly since the LED should be on any time the MicroFogger is on.
void setup() {
  // configure the output pin to control the smoke generator
  pinMode(SMOKE_PIN, OUTPUT);
  // Enable the Arduino device's onboard LED
  pinMode(LED_BUILTIN, OUTPUT);
}
Finally, the loop function turns on the smoke and LED, waits a random number of seconds before turning it off. Next, it waits another random number of seconds before repeating the process.
void loop() {
  // turn the smoke machine on
  digitalWrite(SMOKE_PIN, HIGH);
  digitalWrite(LED_BUILTIN, HIGH);
  // leave it on for a random time between MIN_SMOKE_TIME
  // and MAX_SMOKE_TIME (in milliseconds)
  delay((int)random(MIN_SMOKE_TIME, MAX_SMOKE_TIME));

  // turn the smoke machine off
  digitalWrite(SMOKE_PIN, LOW);
  digitalWrite(LED_BUILTIN, LOW);
  // Wait for another random amount of time
  delay((int)random(MIN_SMOKE_TIME, MAX_SMOKE_TIME));
  // Go back and do it again
}
That's it, there's not much to it; here's the complete sketch:
#define SMOKE_PIN A0
#define MIN_SMOKE_TIME 1000
#define MAX_SMOKE_TIME 5000

void setup() {
  // configure the output pin to control the smoke generator
  pinMode(SMOKE_PIN, OUTPUT);
  // Enable the Arduino device's onboard LED
  pinMode(LED_BUILTIN, OUTPUT);
}

void loop() {
  // turn the smoke machine on
  digitalWrite(SMOKE_PIN, HIGH);
  digitalWrite(LED_BUILTIN, HIGH);
  // leave it on for a random time between MIN_SMOKE_TIME
  // and MAX_SMOKE_TIME (in milliseconds)
  delay((int)random(MIN_SMOKE_TIME, MAX_SMOKE_TIME));

  // turn the smoke machine off
  digitalWrite(SMOKE_PIN, LOW);
  digitalWrite(LED_BUILTIN, LOW);
  // Wait for another random amount of time
  delay((int)random(MIN_SMOKE_TIME, MAX_SMOKE_TIME));
  // Go back and do it again
}
You can find a Gist for it here: https://gist.github.com/johnwargo/e6b19e2d2b905ac7a61d061ea952e482.
In real world scenarios, you won't want to tie up the loop function with delays since nothing else happens while the device waits for the delay to complete. When I get a chance, I'll post something here that demonstrates how I implement that functionality.
Next and/or Previous Posts
<< A Better Arduino MicroFogger Controller Windows 11 Annoying Save As Dialog Categories >>
Header image: Photo by Robin Glauser on Unsplash.