 John M. Wargo
Repeating Countdown Timer in Flutter

Posted: Thursday, June 20, 2024 at 05:07 PM | Categories: Flutter, Mobile Development
A while back, while anticipating a particular event (my retirement), I decided to create an app that allowed me track the number of days until the event. One thing led to another and I decided to create a more generic version of the app so I could write about it here.
You can find the complete application code at Repeat Countdown Timer (Flutter).
I created the app using Google's Flutter mostly because I love working in Flutter and it allows me to create an app that runs on almost any platform.
In the app's current form, you must hard code the event month and day into the app as integer constants as well as the event name as a string
const appName = 'Repeat Countdown';
const eventName = 'Christmas';
const int targetMonth = 12;
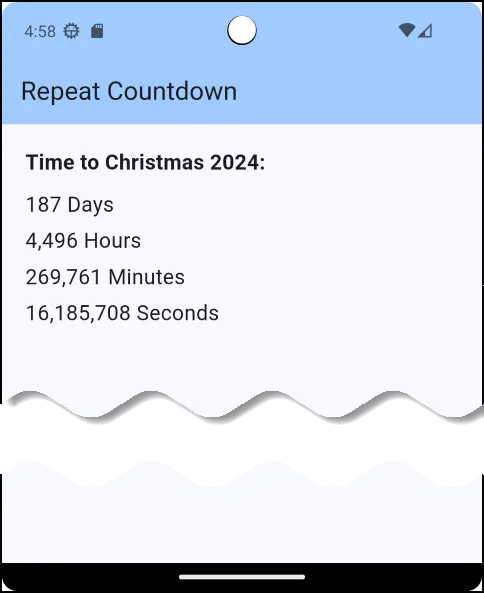
const int targetDay = 25;When you run the app, it keeps a running countdown until the selected event date tracking Days, Hours, Minutes, and Seconds until the selected date. When the clock reaches the specified date, the counter resets and starts tracking the next year's event.
Here's a screenshot of the app in action:
Digging Into The Code
Styling
The app uses some constants to control app styling; you can tweak those to your particular needs.
const double theFontSize = 18;
const double boxHeight = 5;
const TextStyle itemStyle = TextStyle(fontSize: theFontSize);
const TextStyle headerStyle =
    TextStyle(fontSize: theFontSize, fontWeight: FontWeight.bold);
Managing State
The app tracks the event date and updates whenever it changes. If I wanted the app to track only a single date, I'd make it a constant and not worry about tracking state of the variable in the app, but in this case the event date resets every year, so I had to use State to track it.
void initState() {
eventDate = DateTime(DateTime.now().year, targetMonth, targetDay);
timeDiff = getEventDiff();
Timer periodicTimer = Timer.periodic(
const Duration(seconds: 1),
(timer) {
calcTimeDiff();
},
);
super.initState();
}The app uses the timeDiff variable to track the difference between the current date and the event date. Dart provides a Duration object that stores the time difference in days, hours, minutes, seconds, and milliseconds. Once I had my hands on that, building out the app UI was easy.
The Timer object fires every minute and executes the following code:
void calcTimeDiff() {
  // Calculate the time between the current time and the retirement date
  Duration theDiff;

  theDiff = getEventDiff();
  if (theDiff.inSeconds < 0) {
    setState(() {
      // increment the year
      eventDate =
          DateTime(eventDate.year + 1, eventDate.month, eventDate.day);
      timeDiff = theDiff;
    });
  } else {
    setState(() {
      timeDiff = theDiff;
    });
  }
}
As soon as the number of seconds becomes negative, the app resets the event year so it can start counting down to the next event.
Building the UI
Since I had repeatable UI elements (all some variant of the Duration object - days, months, etc.) I created a simple widget that displays the value and updates every time the difference changes.
Widget _countdownItem(
    {required int unit, required String label, required double spacing}) {
  var testSuffix = unit == 1 ? '' : 's';
  var formatter = NumberFormat('###,###,###,000');
  var numberStr = formatter.format(unit);
  return Column(children: [
    Text('$numberStr $label$testSuffix', style: itemStyle),
    SizedBox(height: spacing),
  ]);
}
With that in place, all I had to do was create the app screen and throw in some of those widgets (configured, of course, for the Duration value being tracked by that widget). Here's the code:
Widget build(BuildContext context) {
return Scaffold(
appBar: AppBar(
backgroundColor: Theme.of(context).colorScheme.inversePrimary,
title: Text(widget.title),
),
body: SafeArea(
child: Container(
padding: const EdgeInsets.all(20.0),
child: Column(
crossAxisAlignment: CrossAxisAlignment.start,
children: [
Text('Time to $eventName ${eventDate.year}:', style: headerStyle),
const SizedBox(height: 10),
_countdownItem(
unit: timeDiff.inDays, label: 'Day', spacing: boxHeight),
_countdownItem(
unit: timeDiff.inHours, label: 'Hour', spacing: boxHeight),
_countdownItem(
unit: timeDiff.inMinutes,
label: 'Minute',
spacing: boxHeight),
_countdownItem(
unit: timeDiff.inSeconds,
label: 'Second',
spacing: boxHeight),
],
),
),
),
);
}
}Wrap Up
I played around with adding milliseconds to the app, but it really didn't seem necessary to track things at that level. Besides, I'd have to change the timer to fire every 100 ms or so and that would put an unnecessary tax on device performance and battery life.
I hope you find this app useful.
Next and/or Previous Posts
<< Spam Chase Bank Autopay Halted Ali Express Parts >>
Header image: https://flutter.io