 John M. Wargo
ESP32 Connect Using HTTPS

Posted: Wednesday, January 22, 2025 at 07:02 AM | Categories: ESP32, Internet of Things (IoT)
Links On This Page
As I described in my previous post, I'm working on a project where I'm using an M5Stack device to interact with a Google Firebase Function I have running in the cloud. As I started planning my project's code, I realized that the SSL (HTTPS) requirement Firebase Functions forces on applications would be a problem for me.
Initially, I panicked a bit thinking that using HTTPS connections on an Arduino compatible device would be painful. I knew I'd have to manage certificates in my sketch and I wasn't looking forward to embedding certificates in my code and troubleshooting connection issues. It turns out the process is not that bad, so I decided to build a sample project, publish to GitHub and describe it here.
Code Available on GitHub
You'll find all of the code for this project at HTTPS Client ESP32 Example.
The Goal
The goal for this project/post is to demonstrate how to code an Arduino sketch that:
- Connects over Wi-Fi network to a server connection that requires HTTPS/TLS.
- Writes content returned from the server to the Serial Monitor in the Arduino IDE.
Anything else you want to do is up to you, I'm just showing how to connect to a server using HTTPS and process the data that returns. I have plans for publishing a post that digs into how to pass parameters in the body of the request; stay tuned for that.
Starting Point
First of all, this project is for the ESP32 family of devices. This is important because regular everyday Arduino devices don't support the secure connection as far as I know. The libraries used to do this are in the ESP32 libraries for Arduino. I think there are corresponding libraries for espressif es2886 devices, but I've not researched them.
To build this example, I started with the Arduino BasicHTTPSClient sample sketch. For a variety of reasons, the sample sketch didn't work for me, so I had to go off on my own and write this.
The Public Service
For this project, I selected the JSON API exposed by Bacon Ipsum. I did this for a variety of reasons:
- I think Bacon Ipsum is a cool site and I use it regularly to generate meat-flavored content for documents, and other stuff, all the time.
- The API the site exposes is free to use.
- The API is very simple to use; perfect for this simple example.
Getting the Certificate
I will not provide a lot of details about using HTTPS over HTTP; I leave it up to you to have the background you need to understand this topic (sorry).
To use an HTTPS connection, the sketch must have access to the public version of the certificate the server uses to encrypt the content between the client and the server. The good news is this is really easy to get.
Note: For the screenshots, I'm using Chrome, but any modern browser should work similarly.
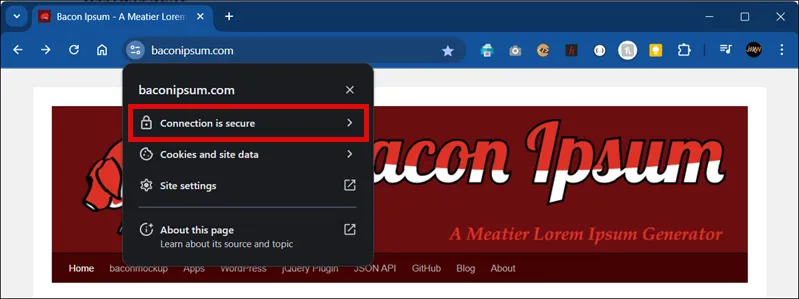
I opened my browser of choice (Chrome) and navigated to https://baconipsum.com/. On the page that appears, I clicked the security options icon that appears left of the URL in the interface (highlighted by the green arrow in the figure below).

In the window that pops up, I clicked the Connection is secure option highlighted in the image:
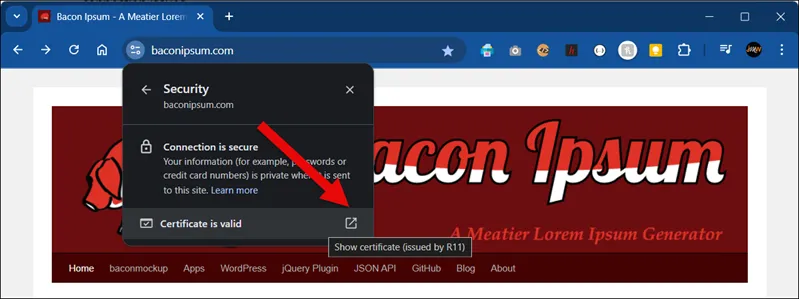
In the window that appears, I clicked the external link next to Certificate is valid highlighted in the image:
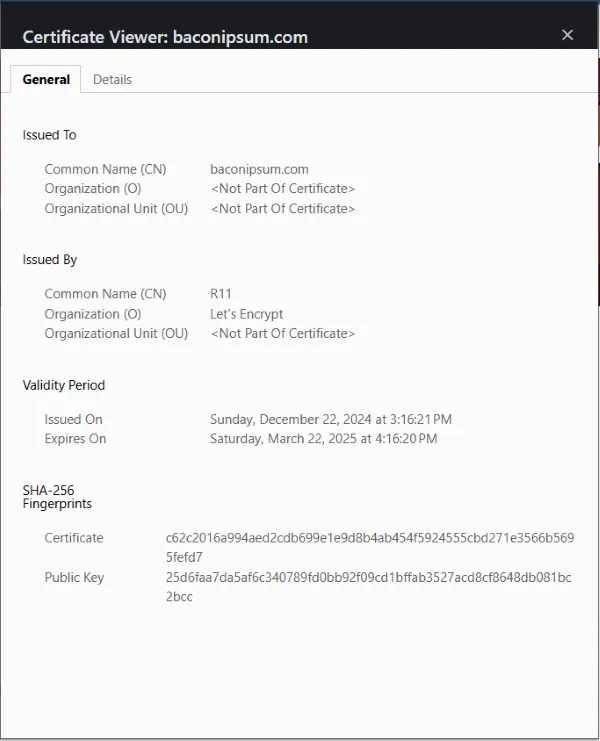
A dialog appears that displays general information about the certificate.
I clicked the Details tab in the dialog and the dialog content updates to show the hierarchical relationship between the server's certificate (baconipsum dot com) and the Certificate Authority Root certificate (ISRG Root X1). As I understand this, the site has a site-specific certificate, which is signed by the R11 certificate which is signed by the ISRG Root X1 certificate.
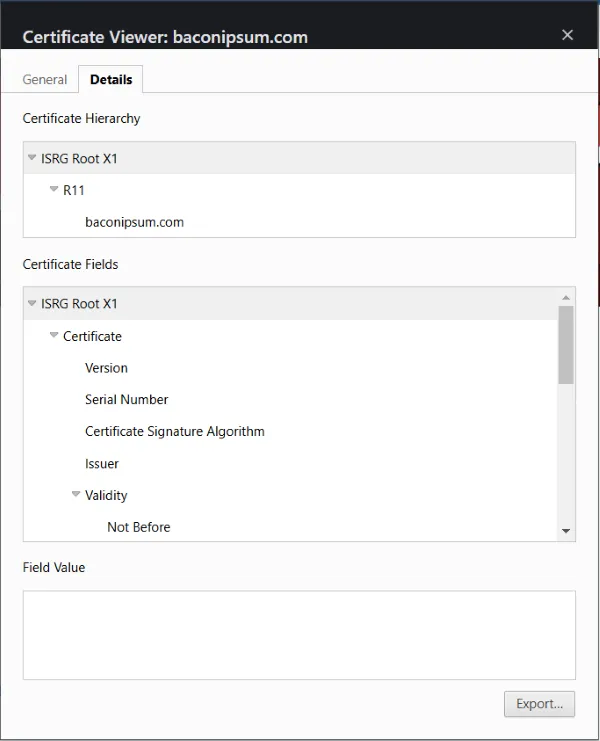
I selected the ISRG Root X1 certificate in the dialog's Certificate Hierarchy section (as I did in the previous image), then clicked the Export... button.
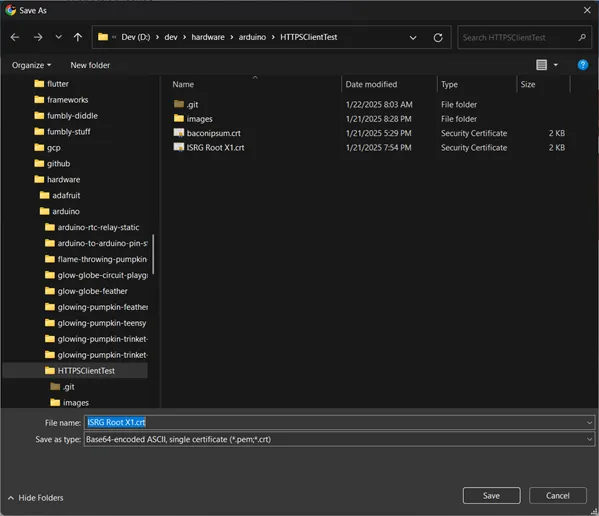
I saved the exported certificate to my Arduino project on my local system. When I opened the file in a text editor, I saw the following (with the three vertical dots indicating there's more to the file than what I'm showing here):
-----BEGIN CERTIFICATE-----
MIIFazCCA1OgAwIBAgIRAIIQz7DSQONZRGPgu2OCiwAwDQYJKoZIhvcNAQELBQAw
TzELMAkGA1UEBhMCVVMxKTAnBgNVBAoTIEludGVybmV0IFNlY3VyaXR5IFJlc2Vh
cmNoIEdyb3VwMRUwEwYDVQQDEwxJU1JHIFJvb3QgWDEwHhcNMTUwNjA0MTEwNDM4
.
.
.
4RgqsahDYVvTH9w7jXbyLeiNdd8XM2w9U/t7y0Ff/9yi0GE44Za4rF2LN9d11TPA
mRGunUHBcnWEvgJBQl9nJEiU0Zsnvgc/ubhPgXRR4Xq37Z0j4r7g1SgEEzwxA57d
emyPxgcYxn/eR44/KJ4EBs+lVDR3veyJm+kXQ99b21/+jh5Xos1AnX5iItreGCc=
-----END CERTIFICATE-----
Converting the Exported Certificate to Code
To convert the certificate file into code you can use in the sketch, I converted it into a character array as shown in the following example. I started by copying the exported certificate file to a file called caCert.h in the Arduino project and opened it in a text editor (yes, you can use the Arduino IDE to edit it).
In the editor, I followed these steps:
- Added the
const char* cert= \at the top of the file. - Added a double quote (
") at the start of each line. - Appended
\n"to the end of each line in the file.
Note: In the following example, I removed the bulk of the certificate content for readability; your file will NOT have the three vertical dots (I put them in there to show you that there is content missing).
Here's an example of the converted content:
const char* cert=
"-----BEGIN CERTIFICATE-----\n"
"MIIFazCCA1OgAwIBAgIRAIIQz7DSQONZRGPgu2OCiwAwDQYJKoZIhvcNAQELBQAw\n"
"TzELMAkGA1UEBhMCVVMxKTAnBgNVBAoTIEludGVybmV0IFNlY3VyaXR5IFJlc2Vh\n"
"cmNoIEdyb3VwMRUwEwYDVQQDEwxJU1JHIFJvb3QgWDEwHhcNMTUwNjA0MTEwNDM4\n"
.
.
.
"4RgqsahDYVvTH9w7jXbyLeiNdd8XM2w9U/t7y0Ff/9yi0GE44Za4rF2LN9d11TPA\n"
"mRGunUHBcnWEvgJBQl9nJEiU0Zsnvgc/ubhPgXRR4Xq37Z0j4r7g1SgEEzwxA57d\n"
"emyPxgcYxn/eR44/KJ4EBs+lVDR3veyJm+kXQ99b21/+jh5Xos1AnX5iItreGCc=\n"
"-----END CERTIFICATE-----\n";
One of the tutorial posts I read suggested using the following format as well; each worked fine in my testing. The only difference is the addition of a \ to the end of each line except for the last one.
const char* cert= \
"-----BEGIN CERTIFICATE-----\n" \
"MIIFazCCA1OgAwIBAgIRAIIQz7DSQONZRGPgu2OCiwAwDQYJKoZIhvcNAQELBQAw\n" \
"TzELMAkGA1UEBhMCVVMxKTAnBgNVBAoTIEludGVybmV0IFNlY3VyaXR5IFJlc2Vh\n" \
"cmNoIEdyb3VwMRUwEwYDVQQDEwxJU1JHIFJvb3QgWDEwHhcNMTUwNjA0MTEwNDM4\n" \
.
.
.
"4RgqsahDYVvTH9w7jXbyLeiNdd8XM2w9U/t7y0Ff/9yi0GE44Za4rF2LN9d11TPA\n" \
"mRGunUHBcnWEvgJBQl9nJEiU0Zsnvgc/ubhPgXRR4Xq37Z0j4r7g1SgEEzwxA57d\n" \
"emyPxgcYxn/eR44/KJ4EBs+lVDR3veyJm+kXQ99b21/+jh5Xos1AnX5iItreGCc=\n" \
"-----END CERTIFICATE-----\n";
I know there's probably a way to make all or most of these changes using Find/Replace or RegEx in a robust text editor, but I don't have RegEx skills and I didn't think find/replace would work for me here. Don't judge me.
An Alternative to Embedding Certificates in Code
The first time I did a cert conversion to Arduino, the cert file I worked with was 184 lines. I did the conversion correctly, but it wasn't fun. As soon as I completed that first one, I set about building some tooling to make the process easier. I started by creating a Node.js command-line utility but switched it to a web app to make it easier for others to use. I may go back and finish the CLI utility, who knows.
Anyway, the app's called Cert2Arduino and it does all that conversion stuff automatically.
To use it:
- Point your browser to the app.
- Enter the name for the code's certificate variable name (default is
cert). - Select the certificate file you downloaded by clicking the Choose File button in the app.
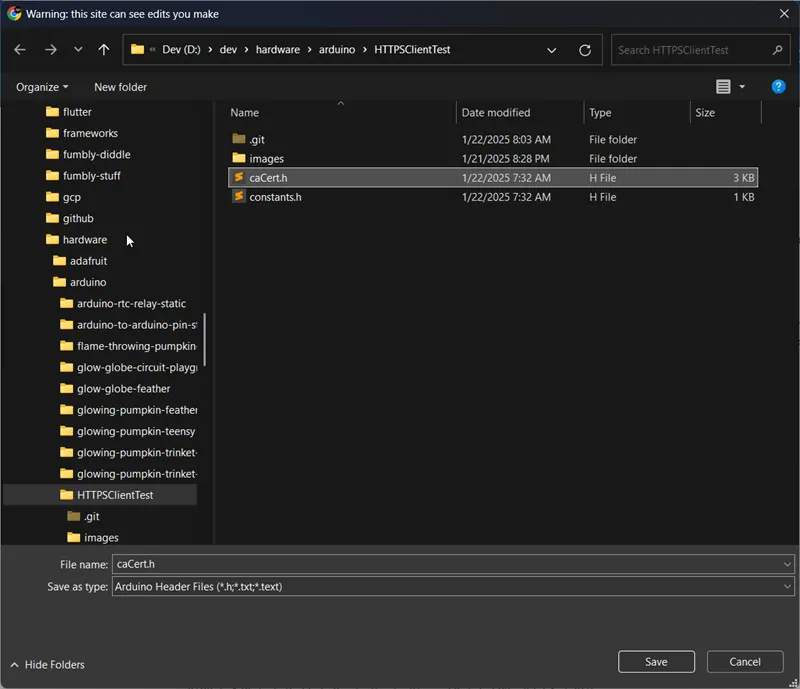
- Generate the file and save it to disk somewhere (probably best to place it in your Arduino project folder) by clicking the Generate Header File button..
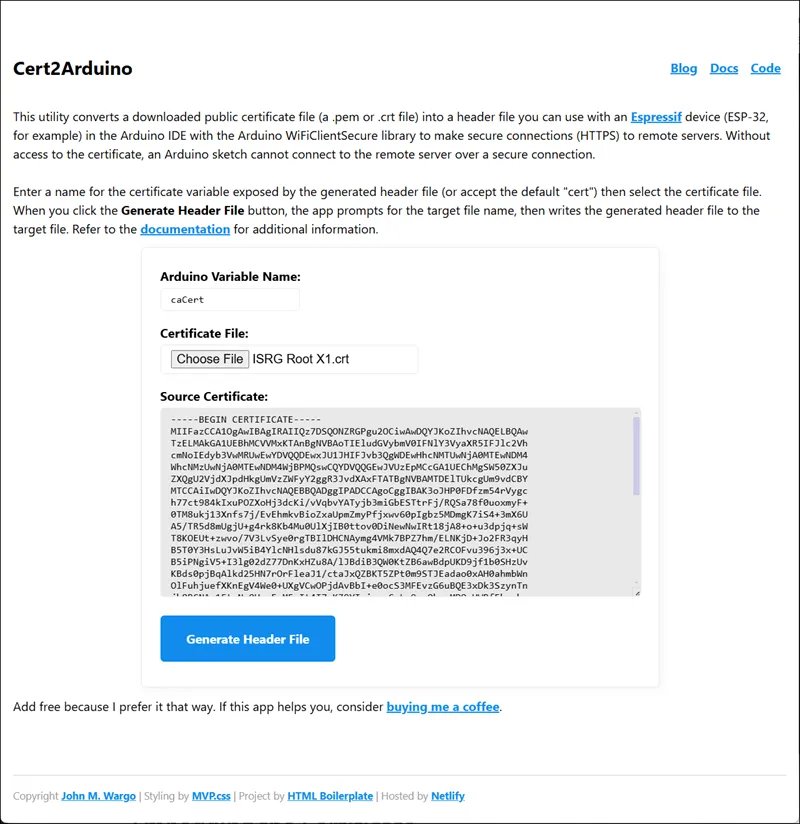
When you save the file, the file name should already be populated with the variable name you specified.
Project Code
Alright, lets start looking at the code.
Project Structure
The project is a little different than what you normally see for Arduino projects.
As I mentioned at the top of the post, I broke out configuration settings (like the Wi-Fi credentials) into a separate file. To load the settings in the project, all I do is include them like this:
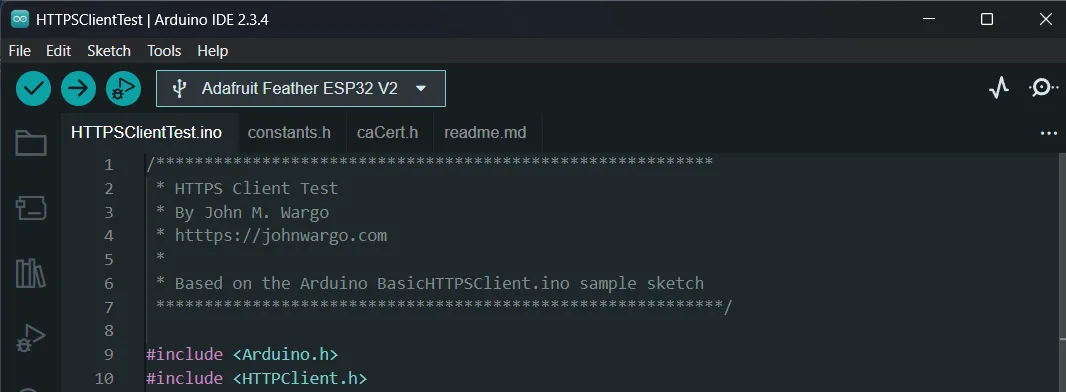
#include "constants.h"Notice that the format of the include statement is a little different, I use quotes to reference project local files where the standard include statement for installed libraries uses corner brackets (#include <Arduino.h>).
I do the same thing with the cert file converted to code, load it using the following statement:
#include "caCert.h"Declarations
Next, the sketch defines some local variables that pull in settings from the configuration file as char arrays (needed for the Wi-Fi library). I also define a constant for the target URL the sketch connects to. I could have made this a #define statement and freed up some memory storage, but this approach makes it cleaner.
const char *ssid = WIFI_SSID;
const char *pswd = WIFI_PSWD;
const char *targetUrl =
"https://baconipsum.com/api/?type=meat-and-filler¶s=1";
int counter = 0;
HTTPClient https;
NetworkClientSecure *client = new NetworkClientSecure;The sketch uses the counter variable to display rows of 25 periods in the Serial Monitor every half second as the sketch connects to the Wi-Fi network.
Finally, I define the https and client objects the sketch uses to create network connections and HTTPS requests.
Setup
In the sketch's setup function, the sketch:
- Enables output to the Serial Monitor and waits half a second for good measure (lines 1 & 2).
- Prints some stuff to the Serial Monitor
- Sets Station mode for the Wi-Fi library. Most examples I've seen set Access Point mode (inbound and outbound connections), but for this example, all we need is the outbound connection enabled by Station Mode. (line 8).
- Connects, or at least attempts to connect, to the Wi-Fi network using (line 10).
- Loops, waiting for the network connection to complete. The sketch writes a period to the console every half second, resetting after 25 periods with a new line (lines 11-19).
- Once connected, it writes a confirmation to the Serial Monitor along with the IP Address for the device (lines 20 to 23).
void setup() {
  Serial.begin(115200);
  delay(500);

  Serial.print("\nConnecting to ");
  Serial.print(ssid);
  Serial.println(":");
  // Set Wi-Fi station mode, no incoming connections
  WiFi.mode(WIFI_STA);
  // connect to the Wi-Fi network
  WiFi.begin(ssid, pswd);
  while (WiFi.status() != WL_CONNECTED) {
    delay(500);
    Serial.print(".");
    counter += 1;
    if (counter > 25) {
      counter = 0;
      Serial.println();
    }
  }
  Serial.println("\nWi-Fi connected");
  Serial.print("IP address: ");
  Serial.println(WiFi.localIP());
  Serial.println();
}
This is the way I code any Wi-Fi connection in my sketches, it's clean and you can easily see progress as you wait for the connection to complete.
Loop
I really only want to connect to the server and retrieve data once. The sample sketch I started with had it checking every 10 seconds, but I moved it out to every 30 seconds so I won't make the folks at Bacon Ipsum mad from connecting too frequently.
The best solution, and a slightly difficult example to build and test, is to connect to the server and retrieve data every time the user (me in this case) pushes the button. Perhaps I'll do this in a future version.
Here's the main loop code for the sketch; study it then read the descriptions that follow it:
void loop() {
  if (client) {
    client->setCACert(cert);
    Serial.println("[HTTPS] Begin");
    if (https.begin(*client, targetUrl)) {
      Serial.println("[HTTPS] GET");
      // start connection to host as a GET request
      int httpCode = https.GET();
      // httpCode is negative on library error
      if (httpCode > 0) {
        // Request sent and response handled
        Serial.printf("[HTTPS] Response: %d\n", httpCode);
        if (httpCode == HTTP_CODE_OK) {
          String payload = https.getString();
          Serial.println(payload);
        }
      } else {
        Serial.printf("[HTTPS] GET failed, error: %s\n",
                      https.errorToString(httpCode).c_str());
      }
      // close the connection
      https.end();
    } else {
      Serial.printf("[HTTPS] Unable to connect\n");
    }
  } else {
    Serial.println("Unable to create client");
    // fatal error, so go into an infinite loop
    for (;;) {
    }
  }
  Serial.println("\nWaiting 30 seconds...\n");
  delay(30000);
}
Lets go through each part of it...
The first thing the code does is assign the Certificate Authority (CA) certificate to the client object. Without this, the HTTPS connection fill fail. Notice that it's setCACert, that's because it uses the root certificate authority certificate, not the site certificate. That's why I selected the ISRG Root X1 when I exported the certificate.
client->setCACert(cert);The library supports other methods for assigning certificates (like setCertificate) but I couldn't get that to work.
Next, the sketch opens a connection to the target server using the client object I assigned the certificate to.
https.begin(*client, targetUrl)This basically opens the connection to the server, but doesn't do anything.
The next line sends an HTTP GET request on the opened connection to the server.
int httpCode = https.GET();The code assigns the result of the GET request to the httpCode variable and through the sketch determines the status of the request:
- Did the library fail to send the command? If so, the result will be a value less than zero (0).
- Did it succeed? Then the result will be 200 (HTTP OK).
- Was another result returned? Then it will be one of the many other HTTP response status codes.
So, in the first case, if the result is less than zero, the sketch reports the error:
if (httpCode > 0) {

  // I'll show you this code in a minute

} else {
  Serial.printf("[HTTPS] GET failed, error: %s\n", https.errorToString(httpCode).c_str());
}
In the second case, the sketch first writes the status code to the Serial Monitor:
Serial.printf("[HTTPS] Response: %d\n", httpCode);Then it checks for a 200 response and writes the results to the Serial Monitor:
if (httpCode == HTTP_CODE_OK) {
  String payload = https.getString();
  Serial.println(payload);
}
If its not a 200 (HTTP OK) response, then the sketch closes the connection since it's already written the result code to the Serial Monitor.
https.end();You could decide to take different actions here based on the result returned, but that's beyond the scope of this simple tutorial.
Code Weirdness
I ran into a little weirdness with the original sketch's code. In the original sketch, the check for status code looked like this:
if (httpCode == HTTP_CODE_OK || httpCode == HTTP_CODE_MOVED_PERMANENTLY) {
  String payload = https.getString();
  Serial.println(payload);
}
Basically, the sketch checks for a returned status of 200 (HTTP OK) or 301 (Moved Permanently) before writing the body of the response to the Serial Monitor.
Unfortunately, as I wrote in Arduino HTTP Client 301 Response, in my initial testing, I ran into 301 errors and the sketch didn't deal with them properly.
I don't know what the issue is and I didn't spend any time digging into it. All I know is that it didn't work, so I pulled the check for httpCode == HTTP_CODE_MOVED_PERMANENTLY out of the sample I published.
<< Certificate to Arduino Command-line Automated Public Cert to Arduino Header Conversion >>
Header image: Photo by Hamed Taha on Unsplash