 John M. Wargo
Raspberry Pi Relay Controller

Posted: March 7, 2017 | | Categories: Raspberry Pi, Internet of Things (IoT)
A while back, I built a Python library for the Seeed Studio Raspberry Pi Relay Controller board; I wrote about that project on this site. As I worked to add some new features to the library, I realized that I needed an easy way to test the different components of the library. I decided to build a web application for the Raspberry Pi that provided an interface for each of the library's functions. I built the application using Flask, an easy to use micro framework for Python; you can find the project's complete source code at https://github.com/johnwargo/Raspberry-Pi-Relay-Controller-Seeed.
When you install the application and configure the Pi to execute the project's server task at startup, you can point your Pi browser to http://127.0.0.1:5000 and you'll see the following interface:
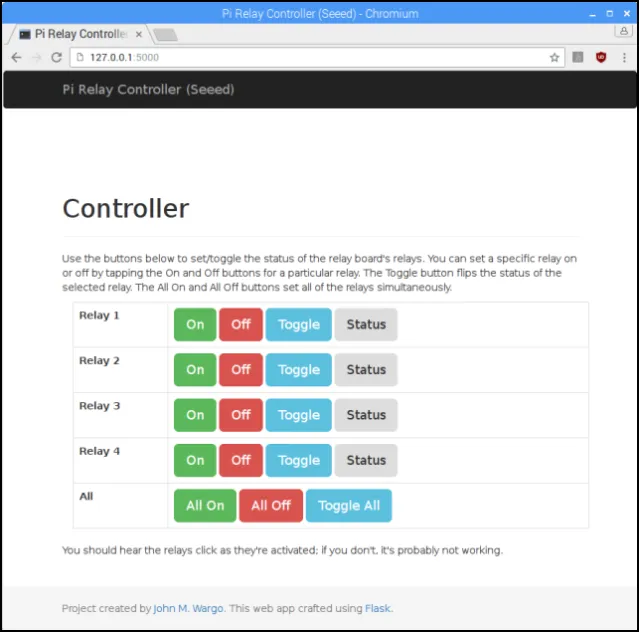
Here, you can turn each relay on or off, toggle the relay's status and view the current status of the relay by clicking the buttons on the page. The All buttons (All On, All Off, and Toggle All) perform the specified operation on all of the relays simultaneously.
For example, you can flip a set of relays easily using the Toggle All button. Turn two of the relays on (say, 1 and 3 for example), then click Toggle All to flip them all, turning 1 and 3 off while turning 2 and 4 on.
To access the web application from outside of your Pi, you'll have to first determine the Pi's IP address. Open a terminal window and execute the following command:
ifconfigThe Pi will display network configuration settings for each of the device's network interfaces. If you're running the Pi on a wired network connection, then you would use the inet addr highlighted in the following figure. If using a Wi-Fi network interface, then you'll want the address for the wlan0 interface.
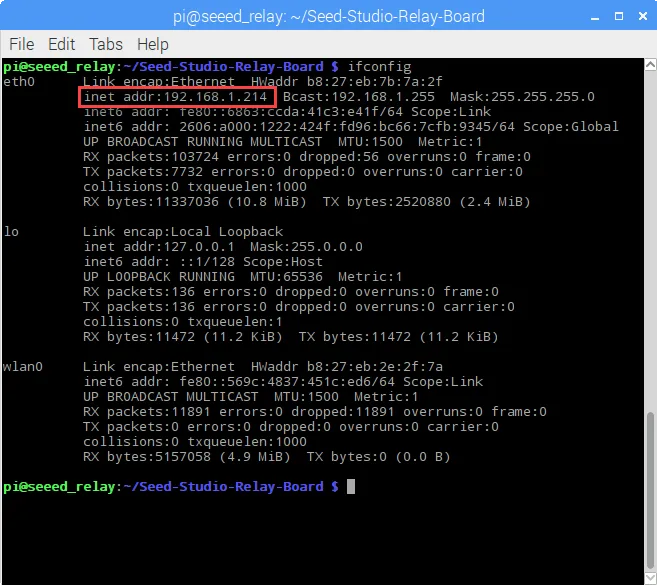
With that address in hand, simply use it to access the controller. Open the browser on any local network connected device and use the address, plus the port number as the page address. For example, for my configuration shown above, I would use the following:
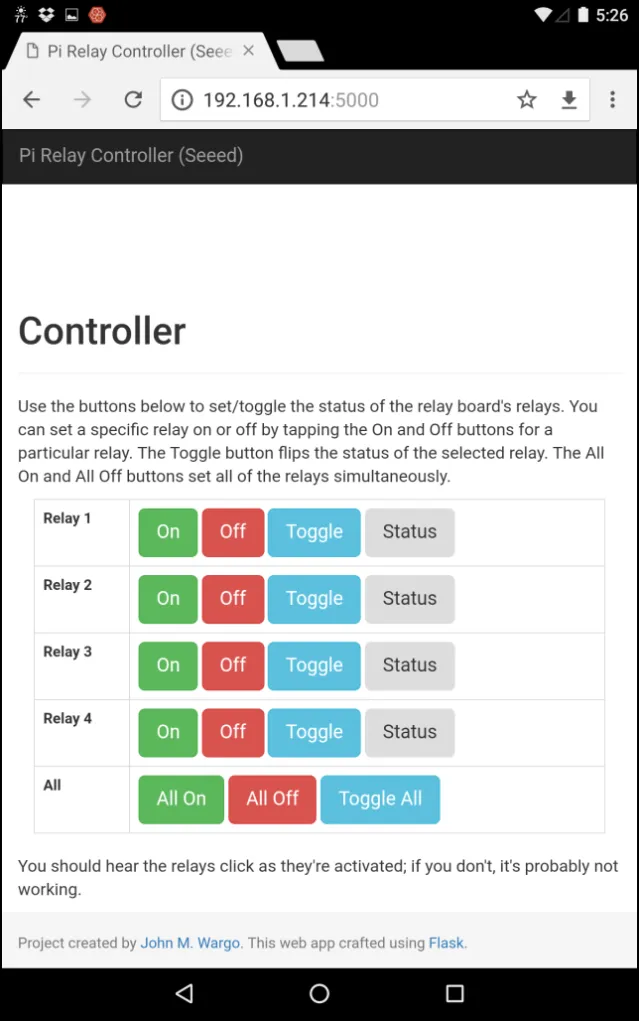
http://192.168.1.214:5000The web application uses Bootstrap, so it will automatically render correctly on any size screen. For example, the following figure shows the same web application running on my Nexus 7 tablet.
With this controller, you can connect different circuits to the relay board and flip them on and off as you validate your hardware. Then, when everything's working as expected, you can code your own application logic for the Pi, replacing this generic controller for your actual application code. Enjoy!
Next and/or Previous Posts
<< Tim the Enchanter Using the Seeed Studio Raspberry Pi Relay Board >>
Header image: Photo by Harrison Broadbent on Unsplash