 John M. Wargo
Bench Power Supply Project

Posted: Sunday, June 16, 2024 at 02:12 PM | Categories: Project Builds
Links On This Page
- Instructables
- Lab Bench Power Supply
- Buck-boost 6-36V 80W voltage regulator with voltage and current meter
- AC to DC 24V 100W Power Supply, AC 110~250V to DC 24 Volt Regulated Switching LED Power Supply, DC Transformer Adapter, Upgraded Power Driver for LED Strip, 3D Printer, Computer Project
- Heat-Set Insert Tips for Threaded Inserts M2 M2.5 M3 M4 M5 M6 M8, Soldering Iron Tips Compatible with Weller SP40NUS/Hakko FX-888D/900M/T18 Irons- Press Tool for Plastic 3D Printer Components
I'm a big fan of Instructables and regularly watch their newsletters for interesting projects. A few weeks ago, one of them caught my eye: Lab Bench Power Supply. This project seemed cool so I decided to build it.
What I liked about this project was that it did a few different things I needed in my shop. I had a bench power supply on my workbench for some time, but it was variable power only, I had to dig out a phone charger whenever I wanted to power an Arduino device or Raspberry Pi. It also has a 3D printable enclosure and with my recent acquisition of a Bambu Labs P1s I knew I had the equipment I needed to build it.
Here's the finished project on my workbench: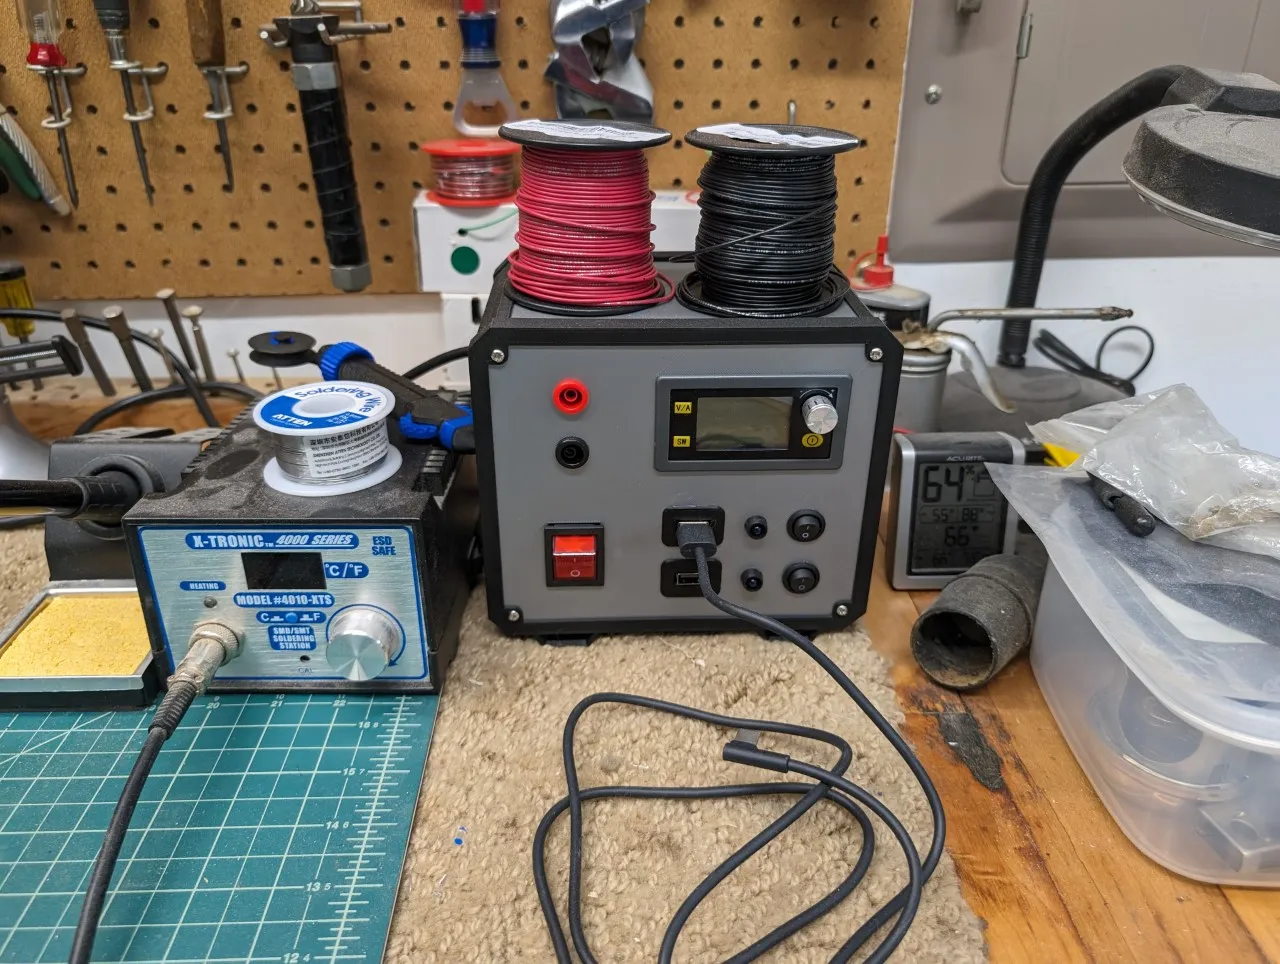
The project includes complete assembly instructions, which is nice, but not a complete part list with links to purchase the items. I found that I had to go digging around for the specific parts I needed. For example, the project's 2 single-pole round switches didn't tell me anything about the diameter of the switches. I purchased some switches I thought would work, but they were too big. After that failure, I measured the switch openings in the printed panels and hunted around for switches that were 14mm diameter (which took me a little longer to find).
The cornerstone component for the project is the Buck-boost 6-36V 80W voltage regulator with voltage and current meter. The link in the original article is broken, so I used a link there that shows a lot of similar devices - they're probably not all the same dimensions, so pick carefully. It's a really cool device that bundles a power converter (input) voltage regulator(output) with a built-in display and controls. Nothing to assemble here, just plug it into the enclosure, give it an input voltage (I used 12V) and you can easily control the output.
The author of the original project used an old laptop power supply to power the unit, but that approach:
- Created the need for extra hardware components in the project to convert the input from the barrel connector to something that could be connected to the Buck-boost device and the USB Step Down converters.
- Added a bunch of unnecessary wire into the enclosure (that two or three feet of wire from the power brick to the barrel connector).
Since I didn't have an old laptop power brick laying around, I decided to take a different approach. For my implementation, I purchased the AC to DC 24V 100W Power Supply, AC 110~250V to DC 24 Volt Regulated Switching LED Power Supply, DC Transformer Adapter, Upgraded Power Driver for LED Strip, 3D Printer, Computer Project from Amazon. At 100W output, it can handle any output requirements from the unit. This particular device comes with two sets of output connectors, so I was able to easily route one set of wires to the Buck boost device and the other to the USB Step Down converters. This change dramatically simplified the internal wiring needs for the unit but I had to just lay the power supply in the unit awkwardly rather than use the tie downs in the enclosure. If I knew enough about editing 3D Printer files (I know nothing), I'd modify them to make the enclosure a little wider to give me a place to stick the power supply against the back wall of the enclosure.
Another interesting aspect of the build was that I got to use brass screw inserts for the first time. I printed the enclosure using grey and black as shown in the figure, then used a soldering iron with a special attachment to push brass inserts into the support braces. With those in place, it was very easy to screw the whole assembly together. I thought that whole process would be hard, but it turned out to be very easy with the right tools. Here's the tool I used to to do the job: Heat-Set Insert Tips for Threaded Inserts M2 M2.5 M3 M4 M5 M6 M8, Soldering Iron Tips Compatible with Weller SP40NUS/Hakko FX-888D/900M/T18 Irons- Press Tool for Plastic 3D Printer Components. I'm really looking for an opportunity to do more with screw inserts in future projects.
The unit is assembled and functional and I've already put it to good use in my shop.
Next Post: Ali Express Parts
Previous Post: Windows Path Backup Utility