 John M. Wargo
Coding Unihiker Programs Using PyCharm

Posted: Monday, February 10, 2025 at 06:02 PM | Categories: Internet of Things (IoT)
A while back, the folks at DF Robot sent me one of the new Unihiker M10 devices to play with. I had a specific use case in mind for the device, but it took me a while to get around to using it.
The getting started documentation is really good and I was able to quickly get Visual Studio Code configured to talk to the device. It wasn't long before I had some of my code running on the device. I'm a huge fan of Visual Studio Code, I use it all the time, especially when coding or writing posts on this site. For python development though, I prefer to use the PyCharm IDE from JetBrains. JetBrains offers a free community edition, but I've had a Professional license for many years - mostly because you need the Professional license to deploy code to a remote device using FTP (or one of its variants).
PyCharm Professional License Required
The remote deployment capabilities of PyCharm demonstrated in this post require a Professional license for PyCharm. As far as I know, you can't do this in the Community Edition. I purchased a Professional license specifically for this capability as I used it repeatedly while programming and testing Raspberry Pi projects.
Creating a PyCharm Project
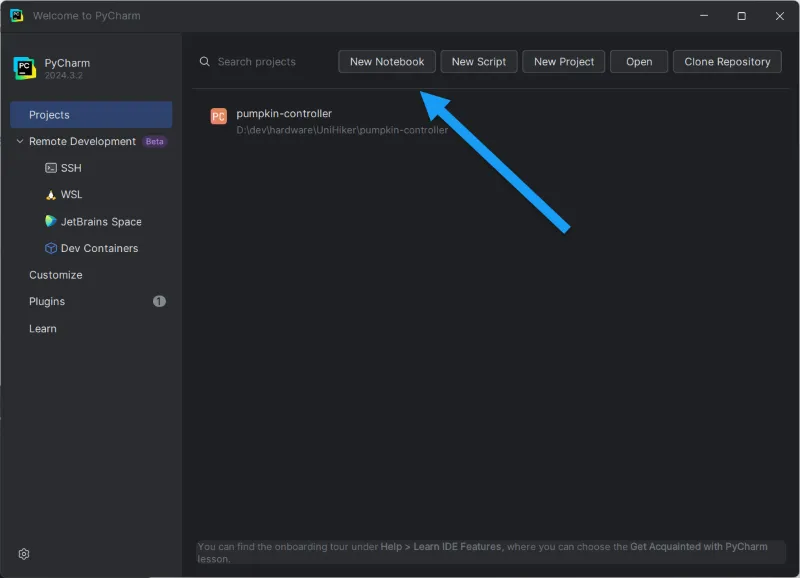
To start coding for the Unihiker using PyCharm, start by creating a new project in PyCharm. When PyCharm loads, it prompts you to either open an existing project or create a new one, select the new project option as highlighted in the following figure:
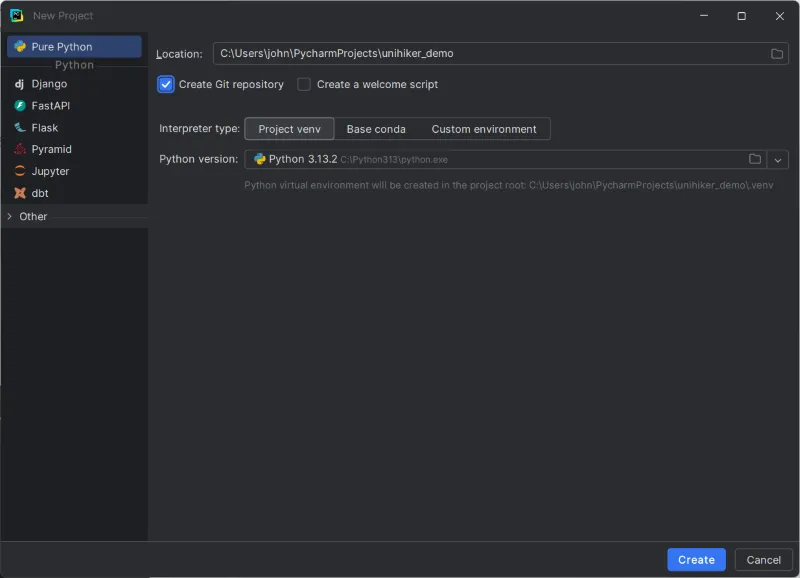
In the New Project dialog that appears, select a folder for the new project. The project folder must already exist, but you can click the folder icon on the far right side of the dialog to select a folder or create a new one. Once you have a target folder selected, click the Create button to create the project.
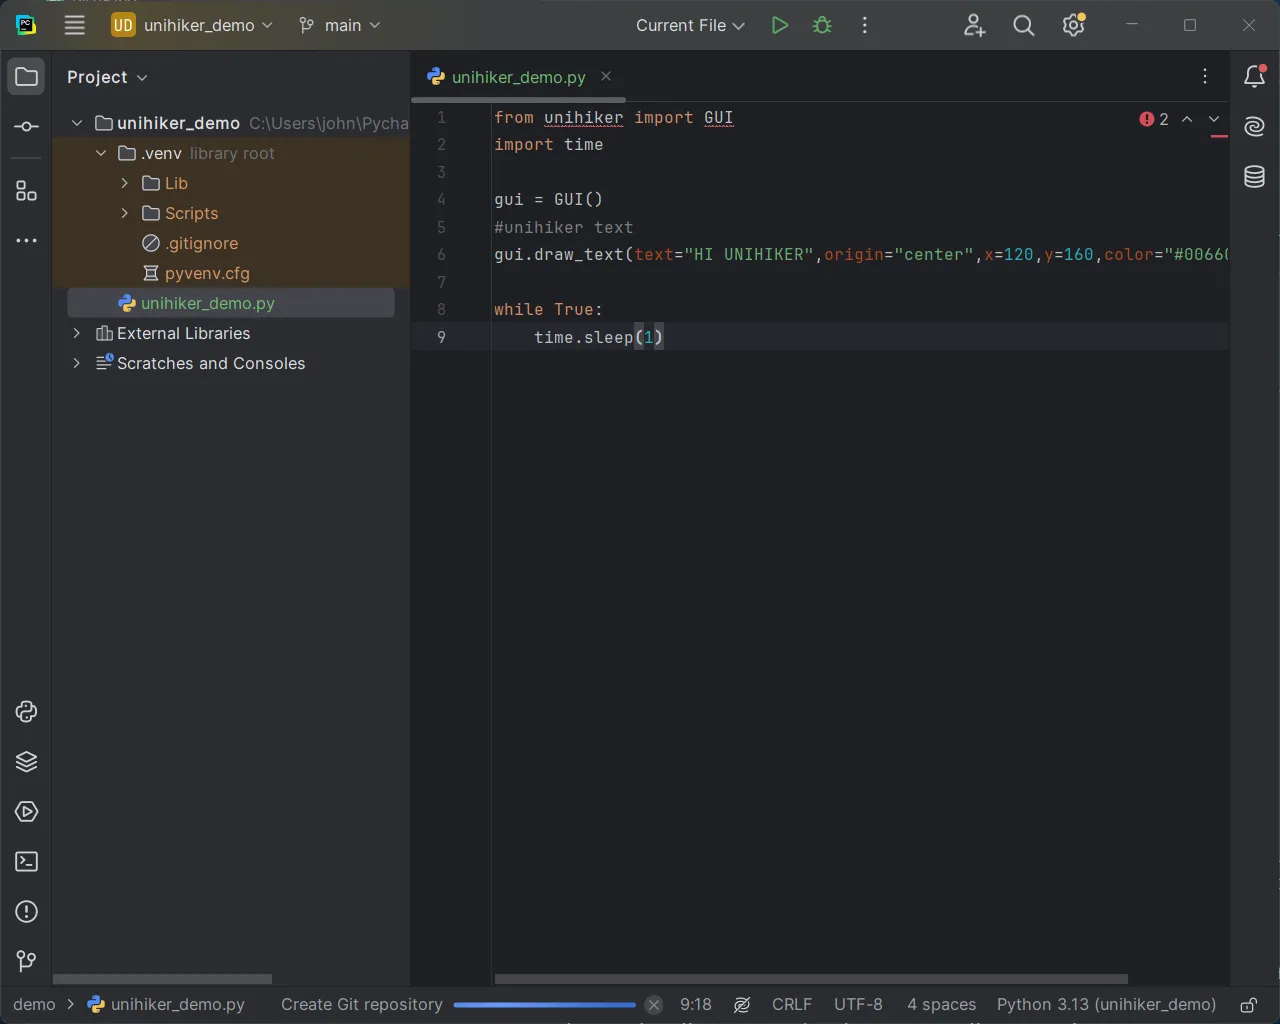
Create a new python file in the new project, in the example below, I called the program unihiker_demo.py. In the Editor, paste in one of the sample programs or write your own.
Once you have a program coded, you're ready to deploy it.
PyCharm Deployment Settings
In the PyCharm IDE, select the Tools menu, then Deployment and finally Configuration.... PyCharm will open the following dialog:
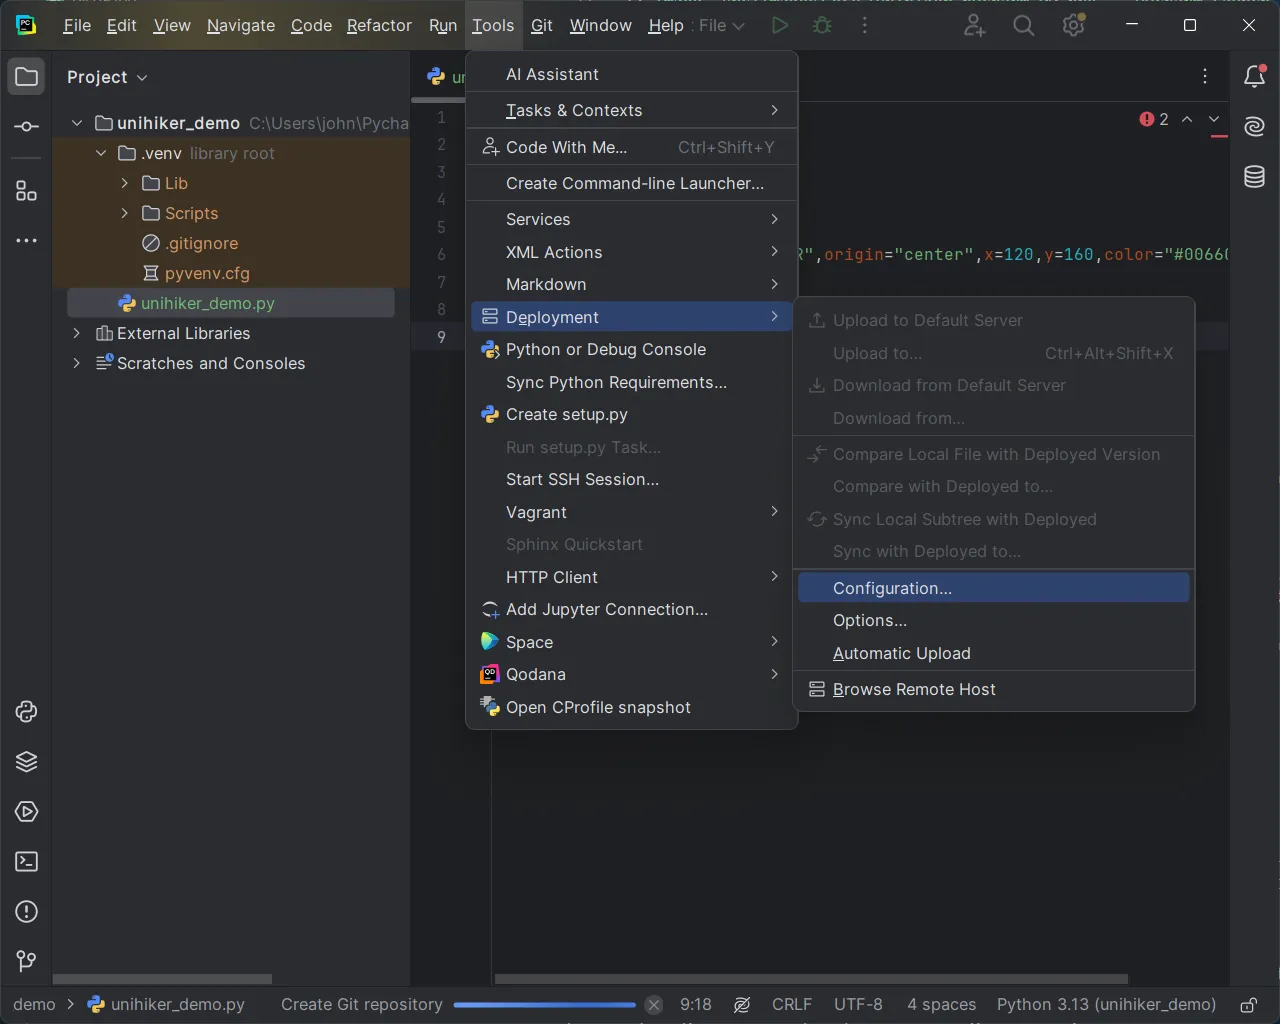
Click the + in the upper left corner of the dialog to create a new deployment configuration.
PyCharm, for some bizarre reason, assumes you're connecting to a web server to deploy server code. This makes no sense to me; you'd think they'd consider other options as well like deploying Python code to a Raspberry Pi or Unihiker device. 😄 Ignore the "Please add a web server to configure" since that doesn't matter here.
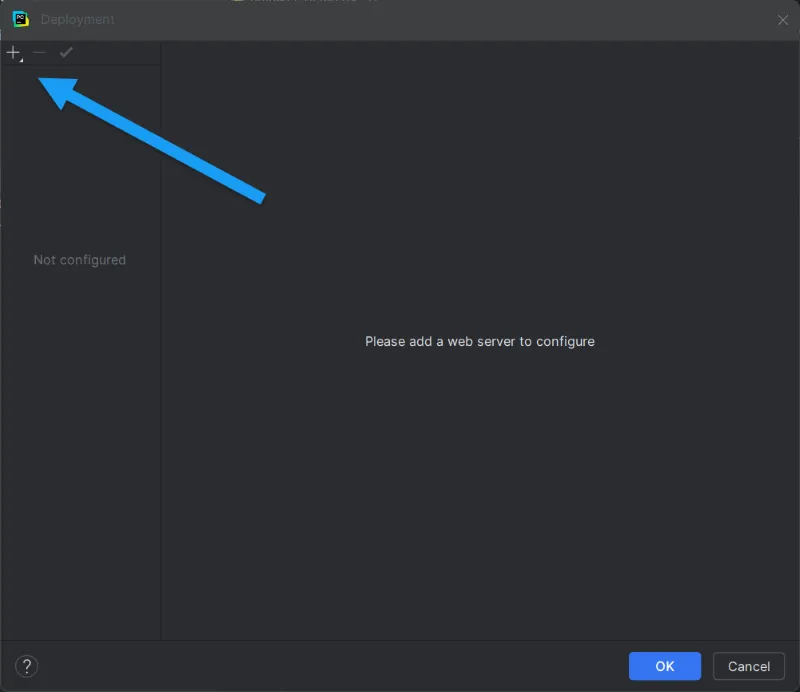
PyCharm first prompts for you to select the deployment connection type; I chose SFTP since that made the most sense to me. You may be able to use FTP or one of the other options as well.
In the Create New Server dialog (again, we're not creating a server location here, so just ignore the nomenclature) enter a name for the new deployment. I chose Unihiker for my deployment configuration since that made the most sense to me.
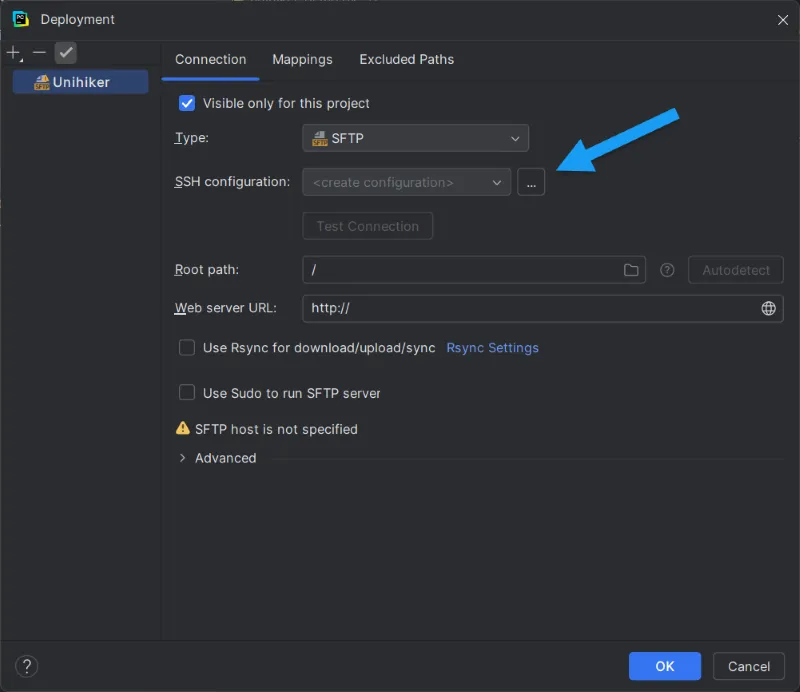
Next, PyCharm opens the configuration dialog for the new Deployment connection. The first thing you must do is configure an SSH configuration for the deployment. Click the ...* button highlighted in the figure.
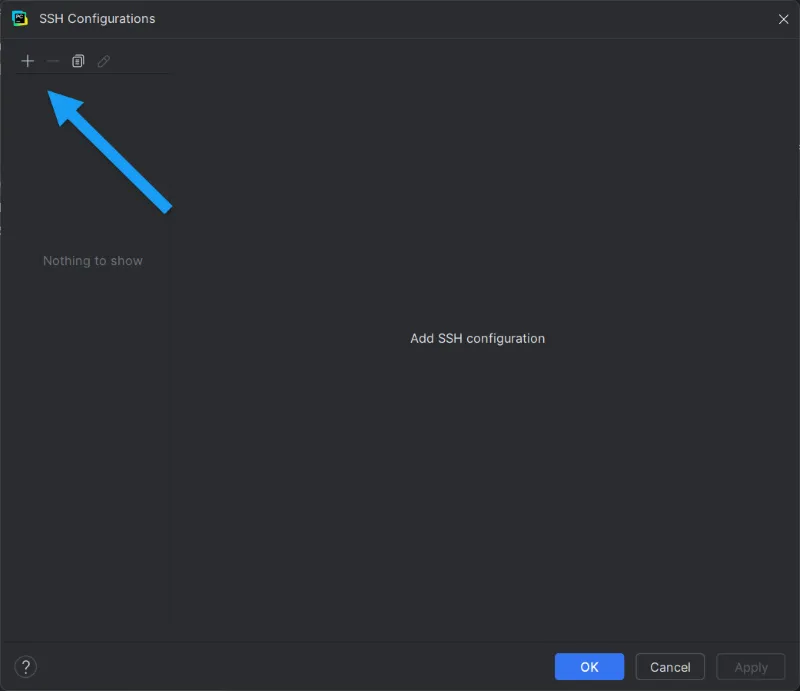
In the SSH Configurations dialog that appears, click the + button to create a new connection.
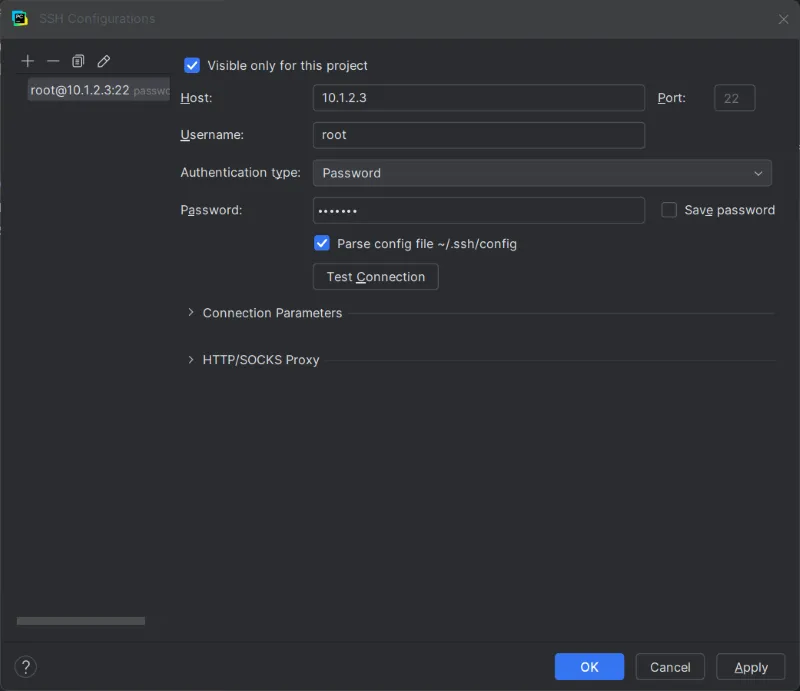
In the dialog that appears, enter:
10.1.2.3for the Host IP addressrootfor the Usernamedfrobotfor the Password
Select a location for storing the SSH configuration, I selected ~/ssh/config for my system. My Windows desktop is broken, so I'm not sure what this looks like on Windows.
Click the Test Connection button to validate the settings. If it doesn't work, change the parameters until it does. 😄
Click the OK button when you're all set the the SSH connection works.
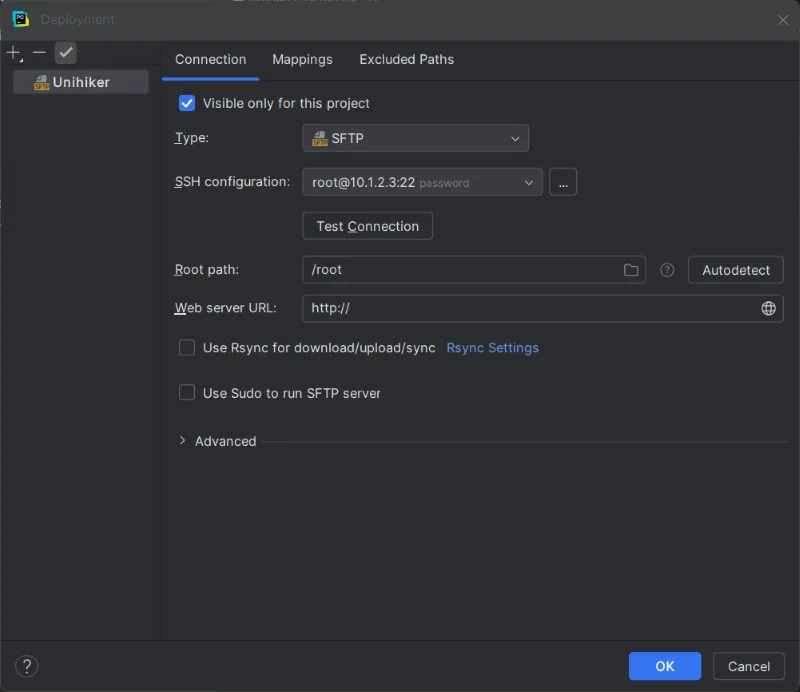
Back at the Deployment configuration, the SSH Configuration field should populate with the SSH configuration you just created (and validated).
For Root path use /root. Again, ignore the stuff about the web server URL, you don't need one since we won't have one.
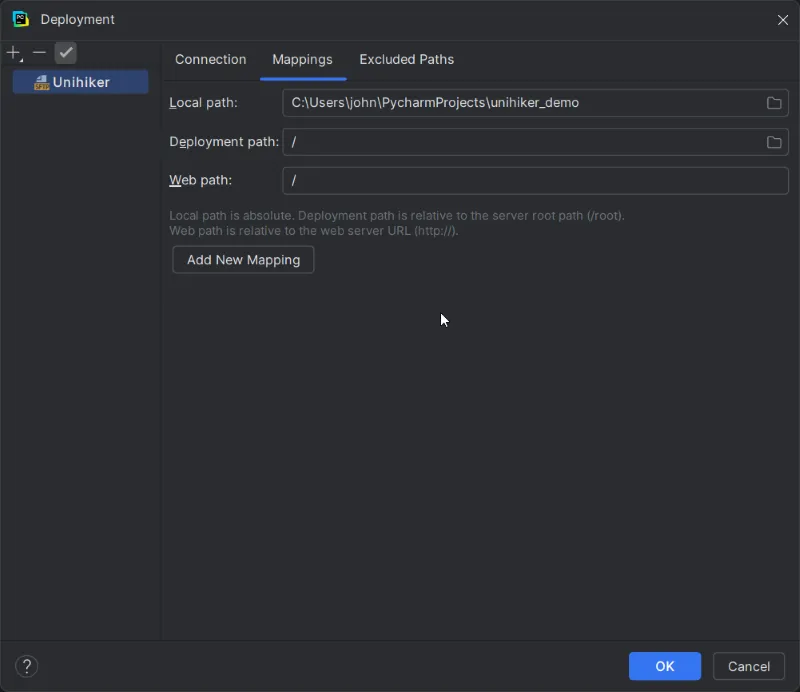
On the dialog's Mappings tab, set the Deployment path to /
Click the dialog's OK button to save your changes.
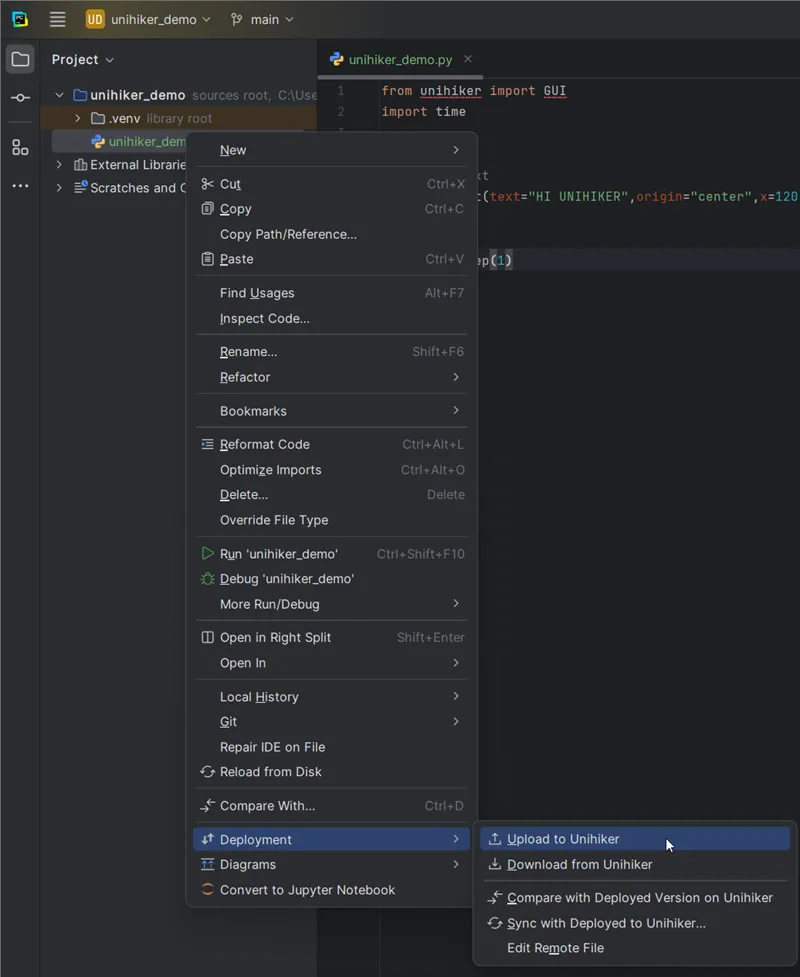
Back in the code editor, right-click on the python program you want to deploy to the Unihiker device. In the menu that appears, select Deployment then Upload to Unihiker as highlighted in the following figure.
Note: PyCharm doesn't know anything about a connected Unihiker; Unihiker was just the name I chose for my deployment profile. Naming it that way makes it crystal clear what I'm deploying to, right?
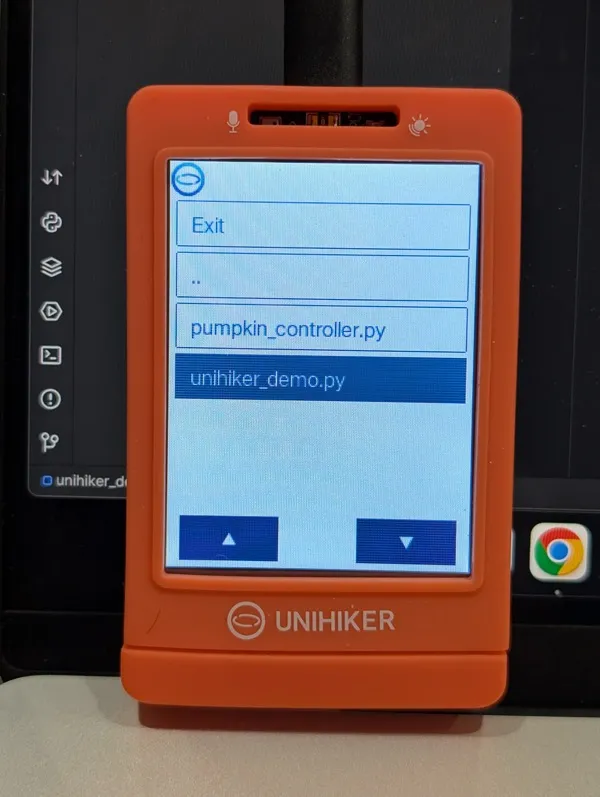
The selected python program should deploy to the connected device. On the Unihiker device, when you press the Home button to open the app menu, select 2-Run Programs and pick the root/ folder and you should see your deployed python program in the menu as shown in the following figure.
Next and/or Previous Posts
<< Added Apps and Demos Page Playing Around with Info Orbs >>
Header image: Photo by Robin Glauser on Unsplash.