 John M. Wargo
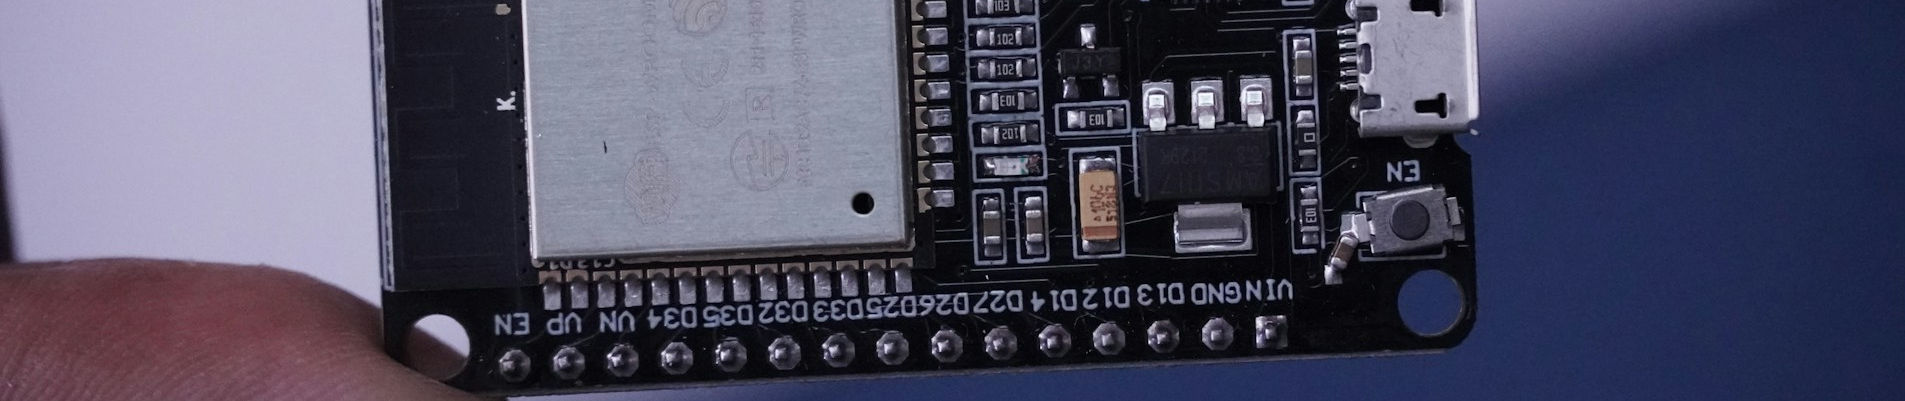
Playing Around with Info Orbs

Posted: Saturday, February 8, 2025 at 08:59 AM | Categories: ESP32, Internet of Things (IoT)
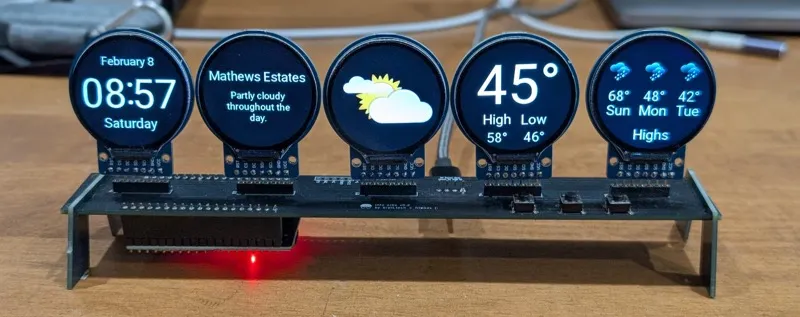
A while back, I learned about this ESP32 project called Info Orbs; it's a simple project that pairs 5 1.8 inch circular displays with a simple stand and some pretty cool software. The kit seems to be designed as a first project for people interested in getting into Arduino; it requires a little bit of soldering and the entire software configuration and deployment process runs in Visual Studio Code. The assembly instructions are simple and easy to follow.
If you're looking for an excellent way to quickly build a very interesting project with a young learner, this one's pretty cool; especially since you can use it to teach soldering.
During assemblyI realized I wanted to present the orbs differently. I built it out as designed, but I already decided I'm going to build a wooden enclosure for it and I've already ordered the parts I needed.
Soldering Issues
My father taught me how to solder when I was about 10 years old (I'm now over 60) so I thought I would have no issues with the simple soldering tasks required to assemble this project. I was wrong. Not because the parts are hard to solder, but because I made mistakes while I soldered the parts.
When I assembled all the parts and deployed the compiled sketch to the device, one of the orbs was blank and the one next to it had content overlapping on it. I hopped on the project's Discord and after a quick search I found the solution.
The project apparently uses the cs pin on the displays to select which display gets which content. When soldering the last display, I did two things wrong. I didn't make a solid solder connection on the Ground (gnd) pin and I also didn't seem to have enough solder on the cs pin. The faulty ground pin connection caused the issue with the blank display. The poor connection on the cs pin caused the content from the penultimate (second to the last) and last display's content to all render on the second to last display. I touched up all the connections on the failed display and everything worked perfectly (as you can see from the image).
I'll let you know when I get the extra sat of parts and start building my wooden enclosure. In the mean time, I'm 3D printing an enclosure for it right now.
Next and/or Previous Posts
<< Coding Unihiker Programs Using PyCharm ESP32 HTTP Client Request with JSON Body >>
Header image: Photo by Hamed Taha on Unsplash